This section is designed to equip faculty with the tools and knowledge to manage and
customize their courses. Here, you will find resources to help you:
Run the Gradebook Setup Wizard to ensure students can track their progress.
Make courses active and accessible for students.
Merge multiple course sections for streamlined management.
Add users, such as GA's or TA's, to your course.
Explore additional course management activities to enhance your teaching experience.
Grades Setup Wizard must be run for each course. The Grades Setup Wizard configures
your course gradebook and allows students to track their progress. Note: if you do not run the Gradebook Setup Wizard for the courses you are teaching,
your students will not be able to see the total points column in the course.
On page 2 when it asks you about releasing the grade column, it is recommended to use the Calculated Final Grade option. You will also want to make sure to check all boxes related to releasing the final
grade as you move through the wizard.
Once you have run the Setup Wizard, verify that the Calculated Total Points column
is visible to your students. If you see the "eye" icon it is visible. If the "eye"
icon has a line through it, it is not visible. In this situation you will need to
manually release the Final Calculated Column.
Brightspace courses are created and set to inactive to allow faculty to build content
prior to making courses available to students. When you are ready to make your course
available to students, you can make your course active.
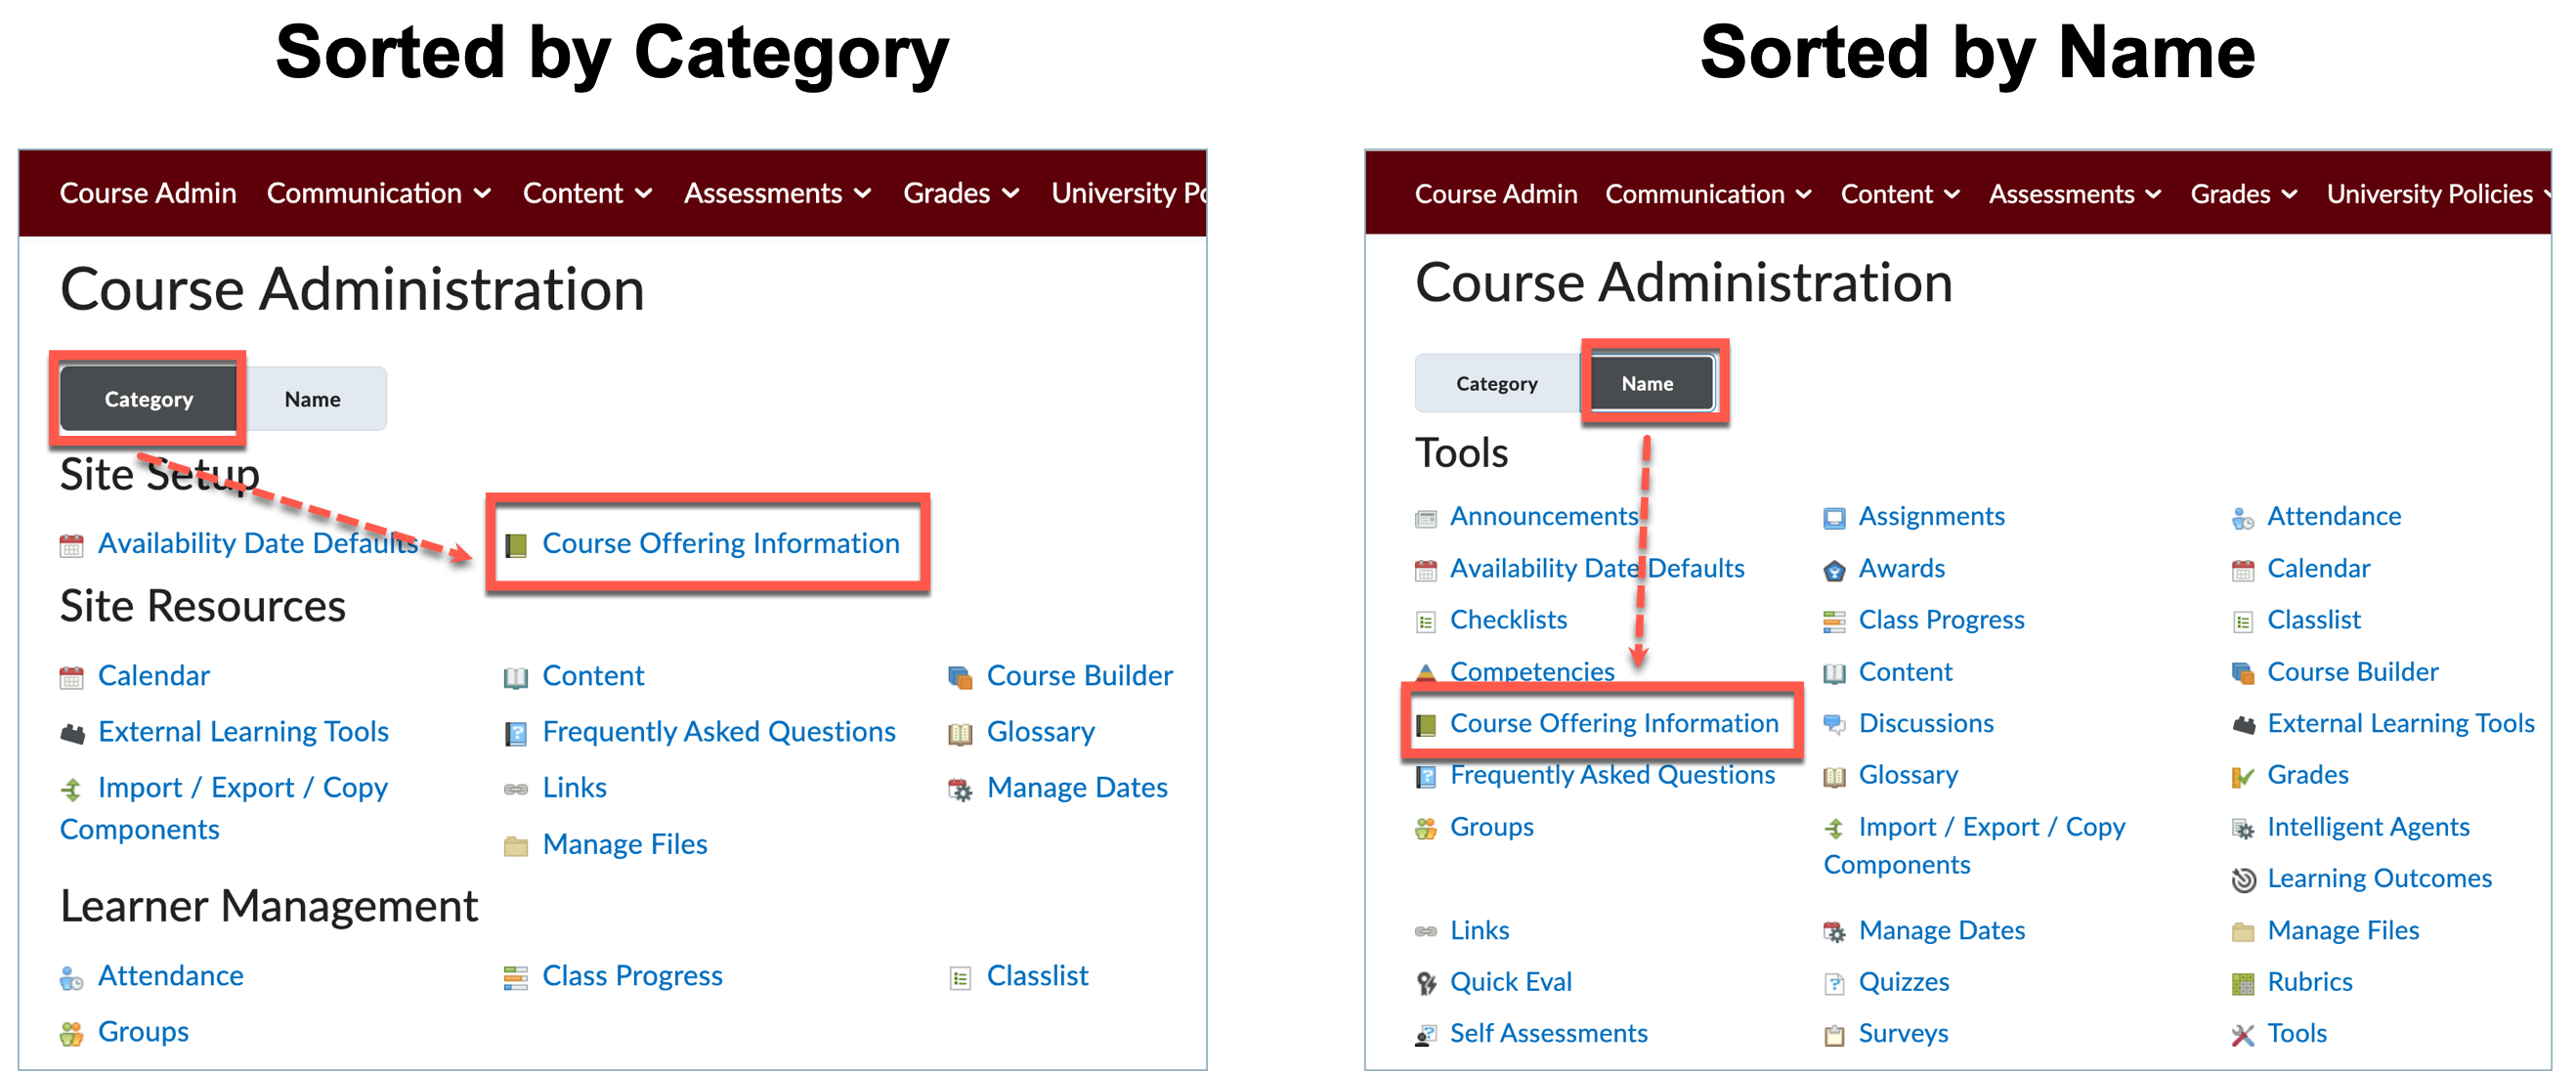
To make your course available, navigate to your course, then select Course Admin from your navigation bar then choose Course Offering Information.
(You can sort the Course Admin area by "Category" or "Name". How you choose to have
it sorted will impact where the Course Offering Information tool is located.)
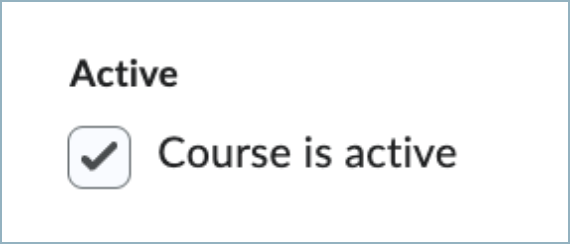
Check the box to activate the course or uncheck it to make it unavailable.
Click Save at the bottom of the page to confirm your change.
Please Note: It may take 5-10 minutes for the inactive indicator to update on your Brightspace
course card on the home page, but if the box is checked the course is active and the
indicator will catch up shortly.
Courses can be combined within Brightspace if you need to teach multiple sections
with the same content.
Courses must be merged before students have submitted any materials, as student grades
do not move as part of a merge, just enrollment.
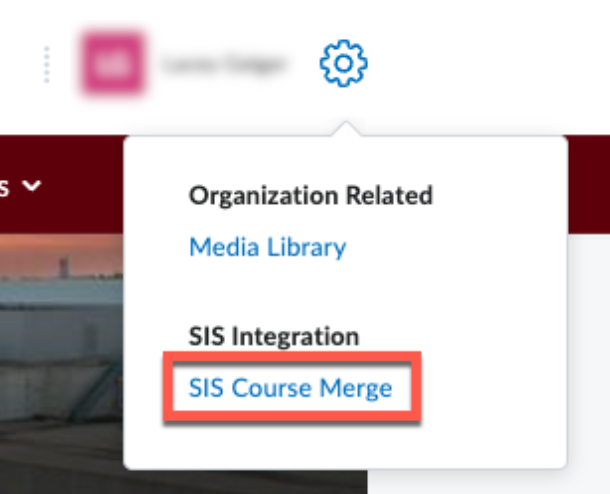
Navigate to Brightspace and click the Admin Tools cog in the upper right corner.
Select SIS Course Merge.
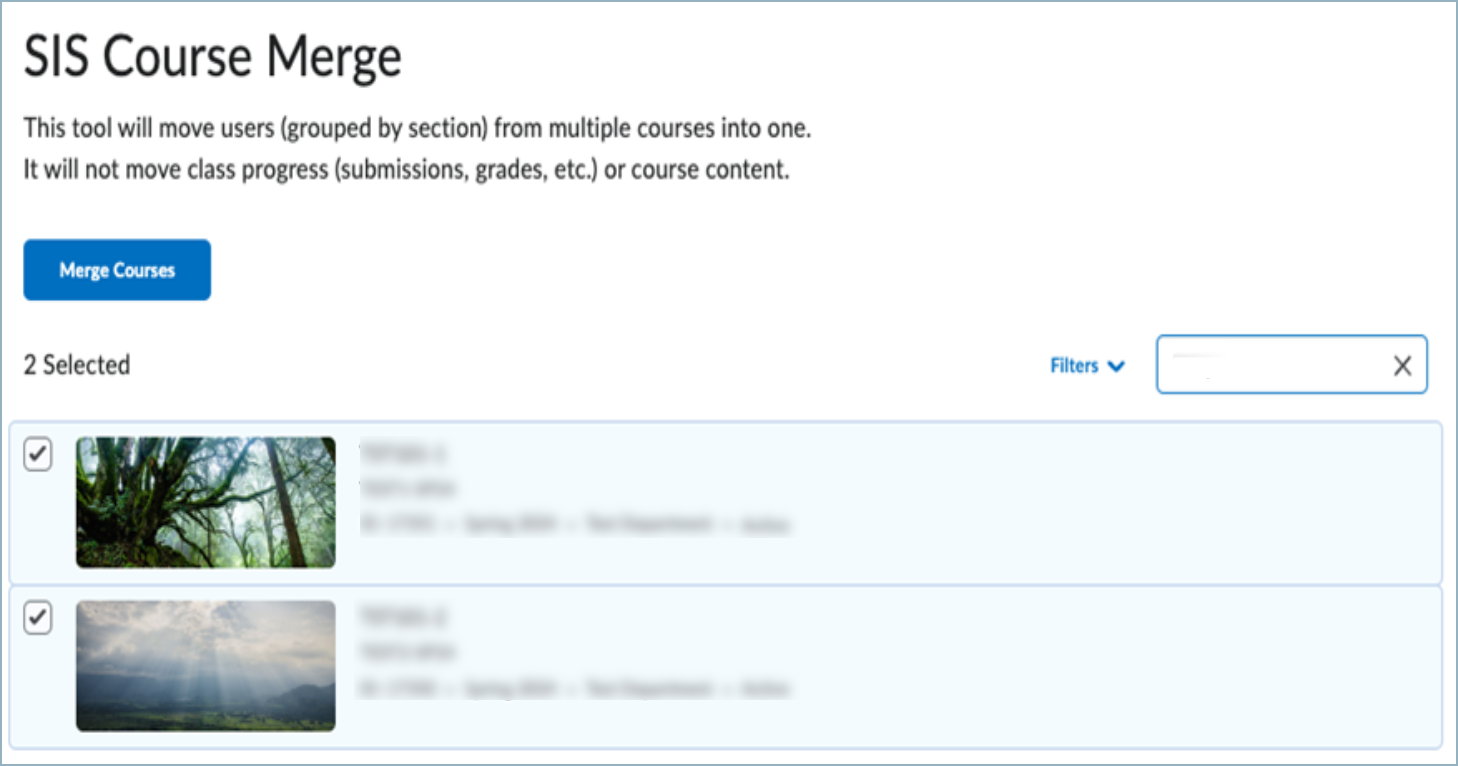
Select the courses you want to merge. You can use the search and filter options as
needed to find the courses from your list.
Click Merge Courses. Next, Select the course you wish to merge content into.
When you have selected the course to merge content into, click Merge.
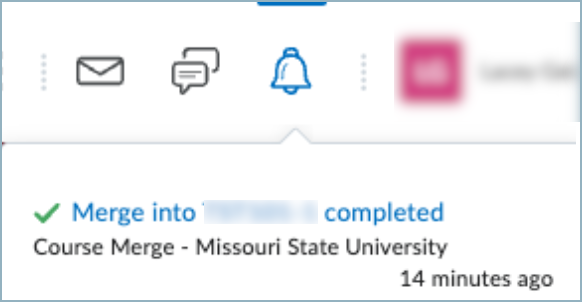
You will see a confirmation that your merge has begun. Depending on the time of semester
this may take a bit of time.
You will receive a notification in Brightspace when it is complete.
Please Note: Sections can be merged by instructors, but due to potential for data loss, they cannot
be unmerged. Please submit a support ticket if you need assistance with unmerging
courses.
Instructors can add users to their Brightspace classes in a limited number of roles.
Please note, instructor and learner roles are exclusively synced from Banner and cannot
be added or removed using this tool.
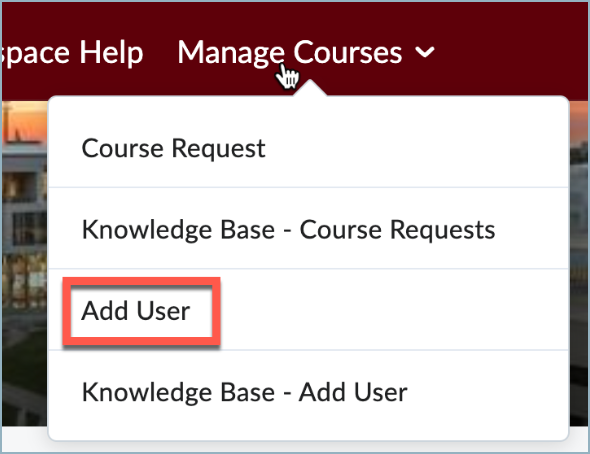
You will find the link to the Add Users page on the Brightspace main navigation bar, under the Manage Courses heading.
To add a user to your course:
Choose a term from the dropdown box.
Enter the M# of the user you want to add to the course. The user must already have
a Brightspace account in order to be added through this tool. If they do not yet have
an account you will receive an error when you attempt to submit the request.
Choose the appropriate role for the user:
Teaching Assistant: access mirrors that of the instructor within the course, allows content to be added
or changed and grades to be updated
Grader: provides access to gradebook, limited access to course content with no permission
to edit
Course Builder: provides access to edit course content, no grading permissions
Choose a course from the table. Please note, courses that have been created within
the last 24 hours will not be displayed, but they will appear after courses are synced
overnight.
Click Add user to course to submit your request. If your addition was processed, you will receive a message
that the user was successfully added. You will see the user reflected in your Classlist
in Brightspace within a few minutes.
To change the name of your course navigate to your course then select Course Admin from your navigation bar then choose Course Offering Information.
(You can sort the Course Admin area by "Category" or "Name". How you choose to have
it sorted will impact where the Course Offering Information tool is located.)
In the box labeled "Course Offering Name*" type in a new name for the course.
Select Save to finalize changes.
Please Note: It may take 5-10 minutes for the new name to update on your Brightspace course card
on the home page.
Requesting Non-Academic Courses
Brightspace shells for non-academic courses can be requested through a custom interface. Each type of course site has the same features available, but they will show up
on different tabs in Brightspace to differentiate the purpose of the course.
You can request a source course in Brightspace for the purpose of developing course
content. It is essentially a template that you keep up to date, which is then copied
into your live courses each semester.
There are no students enrolled in a source course providing you the freedom to make
updates at any time as well as test out various elements to see how they will work.
You can request a source course from within Brightspace by clicking on the Manage Courses tab on the top toolbar
and then selecting 'Course Request'.
Adding Users:
By default, the request process will add you as an instructor to the course you create.
You can add additional users in select roles with the Add Users interface.
This course type is for academic support needs such as advising groups, student organizations,
faculty development groups or departments.
By default, the request process will add you as an instructor to the course you create.
You can add additional users in select roles with the Add Users interface or through the Bulk Add Users interface. The Bulk Add users option is only available for communities.
Please note: you will not be able to add users to a community the same day that you
create it. You will need to wait until records are synced back overnight and you will
see it available to add users the following day.